Full professional restoration by WoodenClassics (NL)

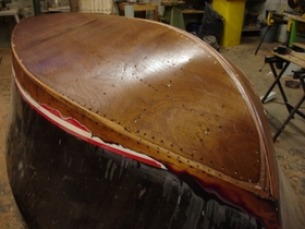
The Arcangeli Super Jolly #94 was bought from a classic boat enthusiast in Belgium in May 2005. It was clear this was a project boat. The woodwork was poor, interior damaged and tatty, the hull was painted and technically very questionable.
Why choose this boat anyway? Because it was original… all chrome parts where there!, original Interceptor engine!, original instruments! and a window frame with glass panes! This was a perfect starting point for a full authentic restoration.
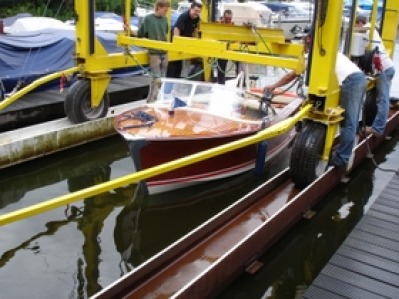
Before starting the restoration we put the Super Jolly in the water to try it and learn how the boat handled and what was really wrong with it. This was apparent in a few hours… the bottom leaked, the technology was unreliable, the seats worn out and so forth. We now knew exactly what to do!
Why choose this boat anyway? Because it was original… all chrome parts where there!, original Interceptor engine!, original instruments! and a window frame with glass panes! This was a perfect starting point for a full authentic restoration.
Before starting the restoration we put the Super Jolly in the water to try it and learn how the boat handled and what was really wrong with it. This was apparent in a few hours… the bottom leaked, the technology was unreliable, the seats worn out and so forth. We now knew exactly what to do!
In July we started with the restoration project. In the list below you will see a complete overview off all important stages between the summer of 2005 and August 2007 when the boat made its maiden trip in full glory.
See the complete overview below from the beginning till testing:
See the complete overview below from the beginning till testing:
The boat was tested before restoration. Now we know what is wrong with it... a lot!
Stripping down the entire boat, all steps and parts are photographed for documentation and reference.
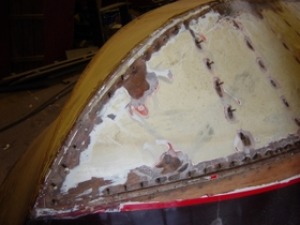
After complete stripping all parts the boat was turned over. The old bottom had to be removed.
The bottom was covered in a thick layer of fiber glass. The old silicon bronze screws are removed and the bottom plywood comes loose.
The bottom was covered in a thick layer of fiber glass. The old silicon bronze screws are removed and the bottom plywood comes loose.

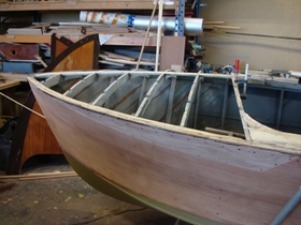
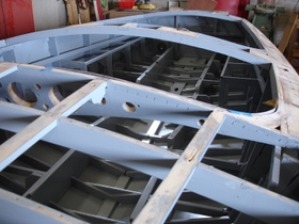
The two half bottom panels are removed. Now we can see the condition of the frames, chines and keel.
About 8 frames are rotten and need to be replaced. The frame connections are also weak. The keel is in bad shape, rotten at 3 places!
About 8 frames are rotten and need to be replaced. The frame connections are also weak. The keel is in bad shape, rotten at 3 places!

We now start with scrapping down all frames and stringers. A lot of work but necssary to restore the backbone of the boat.
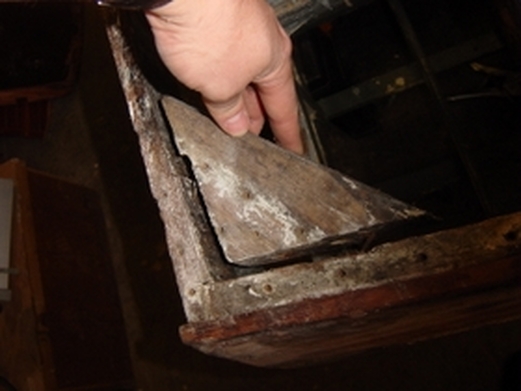
The corners at the tern are gone, no integrity here.
The stern is also completely decayed. The 6 mm plywood was removed.
The rudder base is in very bad shape. The mahogany is basically disintegrated. For sure it was not a safe boat to drive!
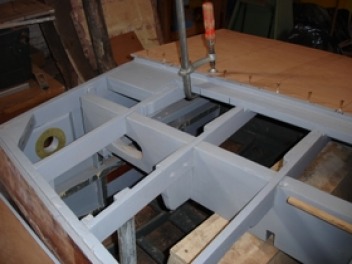
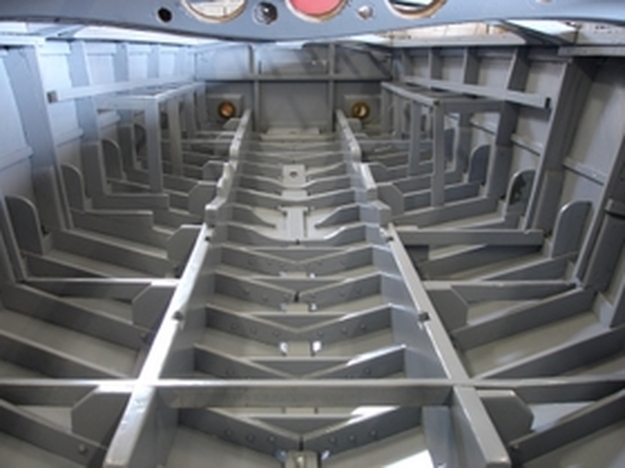
After cleaning all the woodwork 8 frames have been replaced. The frame connectors also have been replaced with new solid mahogany.
We used new Silicon Bronze fasteners. All bare wood has been treated with CPES (Clear Penetrating Epoxy Sealer) to make the wood water and rot resistant.
We used new Silicon Bronze fasteners. All bare wood has been treated with CPES (Clear Penetrating Epoxy Sealer) to make the wood water and rot resistant.
A new oak keel was made to fit and mounted with silicon bronze fasteners and 3M 5200 sealant.
The rudder base was renewed to guarantee a safe control of the boat.
All frames have been levelled to get a nice equal flat bottom for a nice ride.
The rudder base was renewed to guarantee a safe control of the boat.
All frames have been levelled to get a nice equal flat bottom for a nice ride.

All the frames and keel have been painted with Stopanni bilge paint to prevent rot and easy maintenance.
The keel was made to fit as a solid base for the new bottom. Paint was removed from areas where the bottom would have to be glued with 3M 5200.
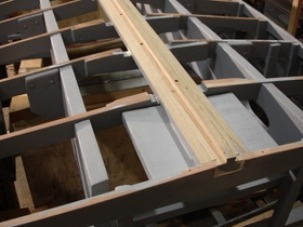
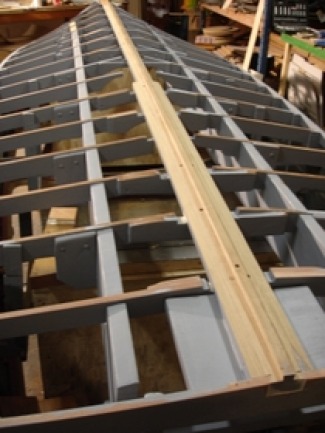
The bow was reinforced with a solid mahogany inlay resulting in a firm bow.
The supporting longitudinal frame was also renewed. Now the bow is strong to carve through the waves again.
The supporting longitudinal frame was also renewed. Now the bow is strong to carve through the waves again.

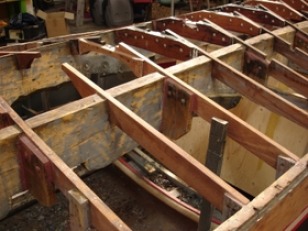
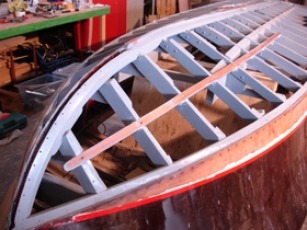
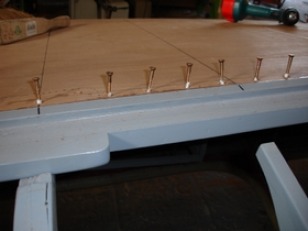
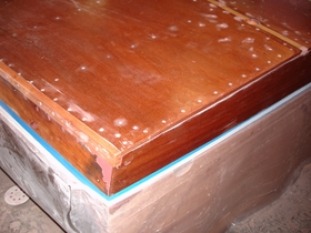
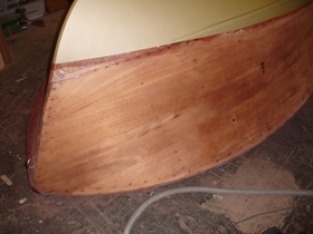
The new bottom is now fitted. We used the highest quality mahogany marine plywood available. The special 10mm plywood panels from Nord Compensati have been made to fit and are mounted with 3M 5200 and new silicon bronze fasteners.
Almost 2000 fasteners have been predrilled and screwed to hold the new bottom.
The bottom panels have been impregnated with CPES before finally fitting them on to the frames/keel/chines.
The bottom panels have been impregnated with CPES before finally fitting them on to the frames/keel/chines.
As you see we used first quality materials only!
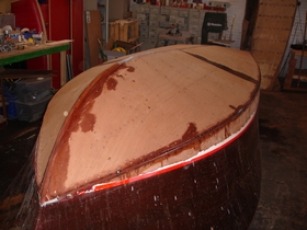
The bottom is in place!
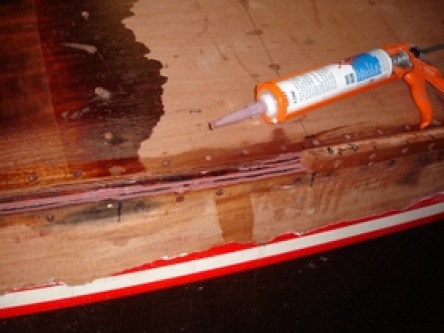
Now the chines need to be completed. A chine is placed to seal the connection between hull and bottom. This is fitted with 3M sealant.
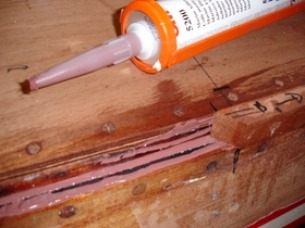
No water will leak through this corner connection.
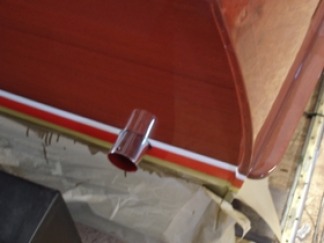
The chine is later protected with a brass side strip.
The chine is later protected with a brass side strip.

The bottom surface is now impregnated with CPES to prevent penetration from water.
As you see a nice smooth surface
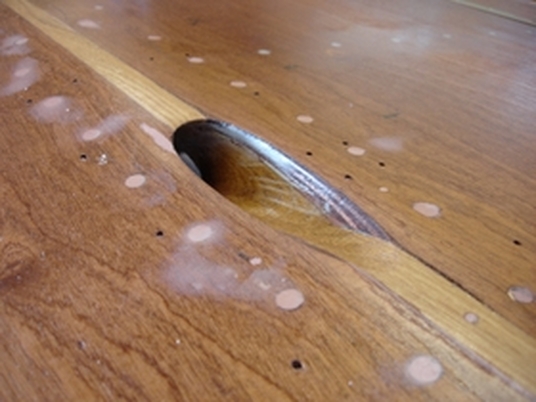
The hole for the driveshaft is drilled. This was a challenge!
All counter sunk fasteners are now filled with CPES filler.
Next step finishing!
Next step finishing!
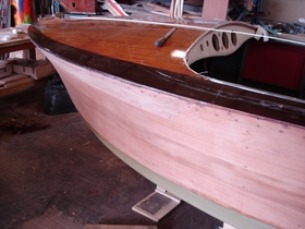
The first coats are applied with Stopanni Anticorrosiva. A protective primer. 4 coats are applied.

The next layer consists of Stopanni Resolution primer, a flexible rubber-like coating to protect the bottom.
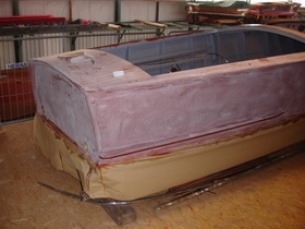
We also stripped the old paint from the hull. This was epoxy, so two days with a hot blower to scrape inch by inch without damaging the mahogany veneer.
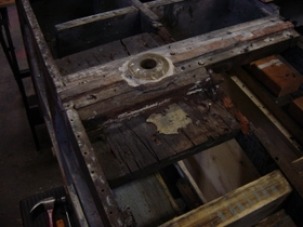
Finally the boat was turned over again. Next job.. the deck!
The old deck was stripped off.
Notice the bad patch of veneer on the hull. This needs replacing with a good quality veneer.
Notice the bad patch of veneer on the hull. This needs replacing with a good quality veneer.
The old veneer was removed and a new matching part was fitted.
The deck was now levelled out to ensure a nice smooth deck.
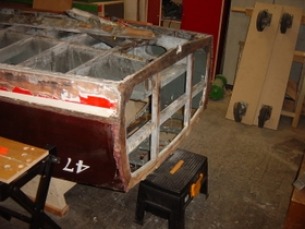
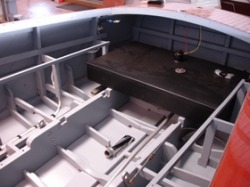
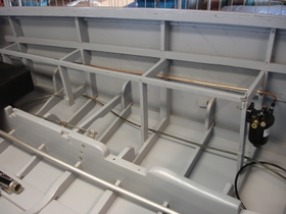
An empty boat! The whole inside is in top condition again.

Preparations for the exhausts. The whole stern is new.
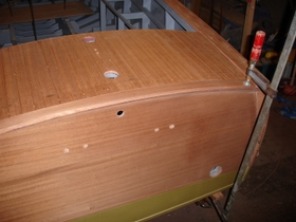
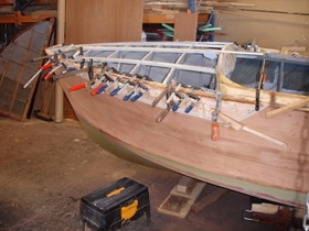
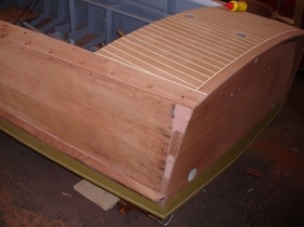
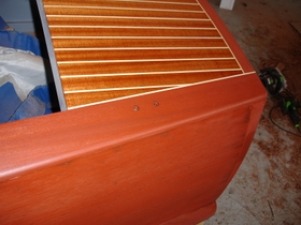
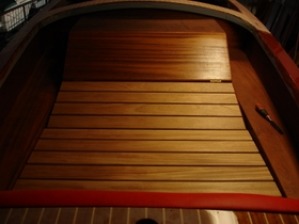
A new deck is placed. We used solid sides and marine grade quality plywood for the inner parts.
The inner panels have a 4 mm layer of kaya veneer. Pre cut for white wood inlays.
The outside is mode of solid 10 mm Sipo mahogany.
The inner panels have a 4 mm layer of kaya veneer. Pre cut for white wood inlays.
The outside is mode of solid 10 mm Sipo mahogany.
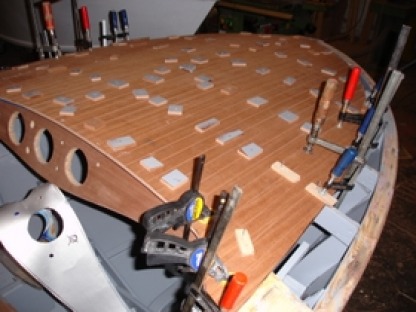
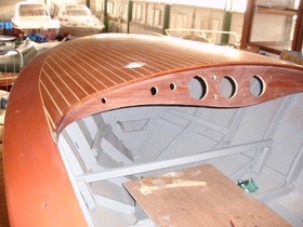
The front deck is mounted.
The panel is cut to shape and mounted with epoxy and screws.
The panel is cut to shape and mounted with epoxy and screws.

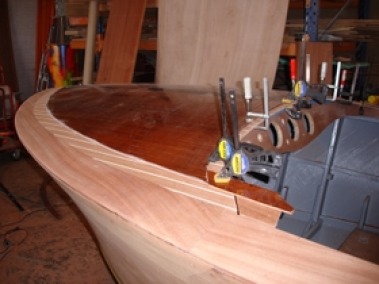
The side planks are made to fit and glued / screwed on.
Solid Sipo mahogany 10 mm is used.
Solid Sipo mahogany 10 mm is used.
The two new stabilizers are fitted.
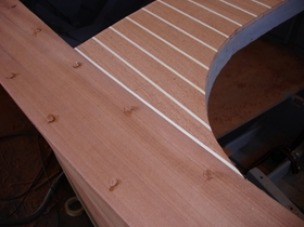
Side planking with bungs. Ready for modelling them into shape.
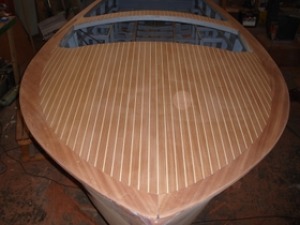
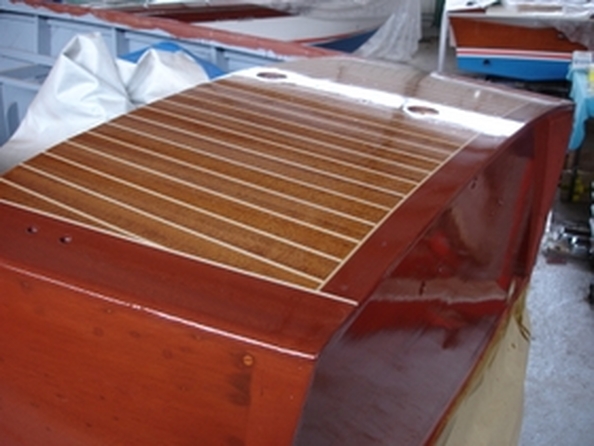
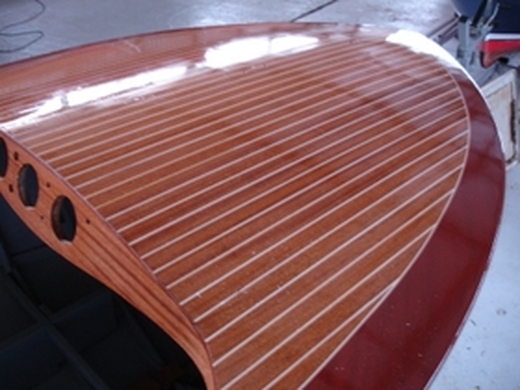
The front deck with white inlays.
Next job is to place the outside wood insert!
Next job is to place the outside wood insert!
We used the old deck panel as a template for the router.
The 4 mm was carefully carved out to hold the wooden insert.
The 4 mm was carefully carved out to hold the wooden insert.
The boat was moved to Riva Harting for the final sanding and varnishing.
The inner decks (not to be stained) are coated with Stopanni 910 varnish.
The inner decks (not to be stained) are coated with Stopanni 910 varnish.
Next is to stain the surrounding Mahogany with Stopanni Magano Paste.
This will give the boat a typical Italian look.
This will give the boat a typical Italian look.
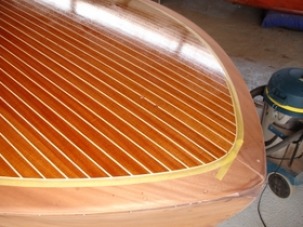
The first coat of Stopanni 910 varnish. Here we get a preview of how the boat will look.
We opted for a traditional and flexible varnish system.
Polyurethane is flexible and better suited than epoxy (cracking, yellowish, bad UV resistance).
We opted for a traditional and flexible varnish system.
Polyurethane is flexible and better suited than epoxy (cracking, yellowish, bad UV resistance).
This is just the first coat, about 20 more will follow.
Applying 2 coats drying and sanding.
We took 9 months for this process to give the polyurethane time to settle and shrink.
We took 9 months for this process to give the polyurethane time to settle and shrink.
In the meantime we continued to work on the interior, technical installation and other details.
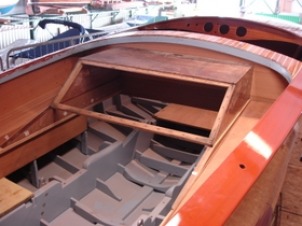
The (partly new) interior is made to fit and is completed mounted before taking it apart for varnishing.
The engine cover is also restored
The engine cover is also restored
The rear seat is made to fit.
In the meantime the upholsterer has finished restoring the seats. The construction was restored and covered with original (Riva) material.
In the meantime the upholsterer has finished restoring the seats. The construction was restored and covered with original (Riva) material.
The dashboard was veneered with a 4 mm Sipo veneer.
The sundeck made to fit.
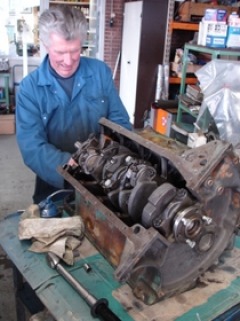
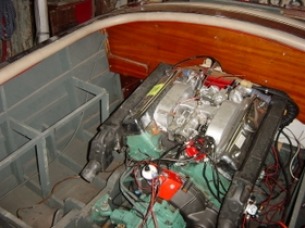
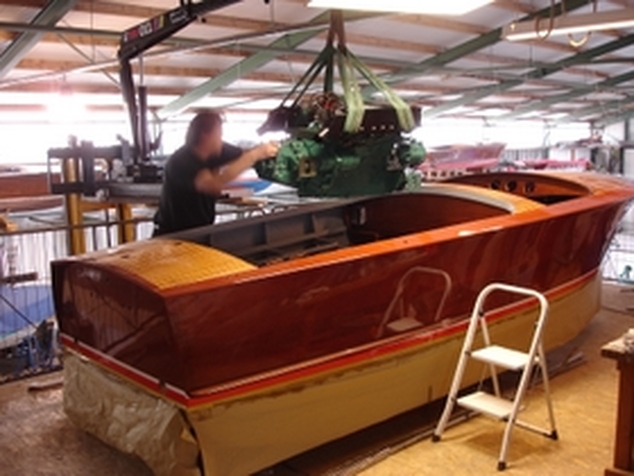
January 2007, time to restore the engine!
This is a job for an experienced specialist. We used our partner PeTeC for this.
The whole engine was taken apart and all parts inspected.
many parts needed to be found and ordered. We had to buy EUR 2,000 worth of replacement parts in the USA.
This is a job for an experienced specialist. We used our partner PeTeC for this.
The whole engine was taken apart and all parts inspected.
many parts needed to be found and ordered. We had to buy EUR 2,000 worth of replacement parts in the USA.
All parts had to be restored, painted and assembled.
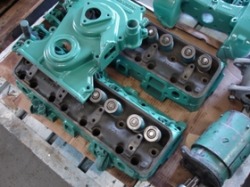
Cylinder head revision with new valves, springs and cam followers.
New camshaft, timing gear, oil pump and many smaller parts.
Cylinder head revision with new valves, springs and cam followers.
New camshaft, timing gear, oil pump and many smaller parts.
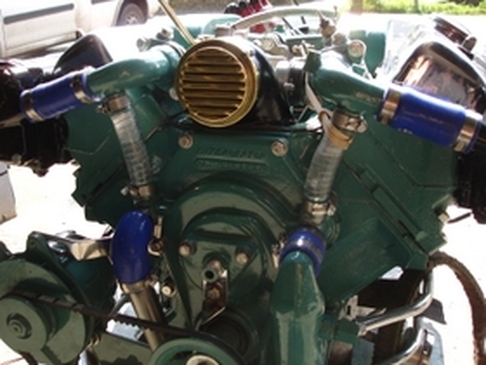
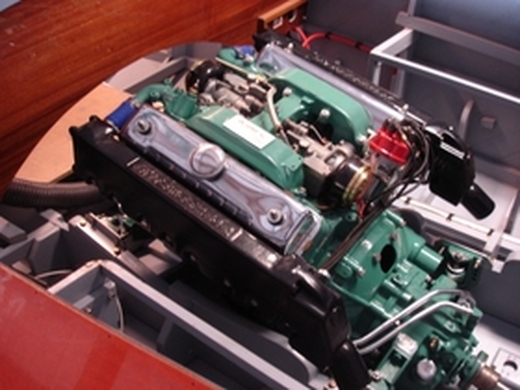
The result!
The engine is assembled and fired up again.
some work needed done on the two restored Carter carbs. New metering rods and calibration to have the optimal balance between performance and fuel consumption.
electronic ignition was added to improve efficiency.
A EUR 7,000 job, but worth it!
The engine is assembled and fired up again.
some work needed done on the two restored Carter carbs. New metering rods and calibration to have the optimal balance between performance and fuel consumption.
electronic ignition was added to improve efficiency.
A EUR 7,000 job, but worth it!
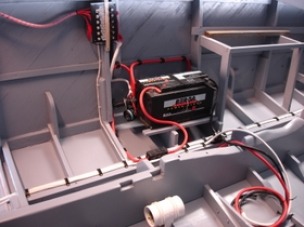
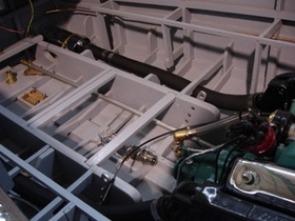
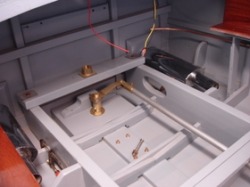
In the meantime we prepared the technical installation.
The electrical installation is now new. New wiring and components to ensure reliability and safety.
We added a fuse box with separated circuits.
Cabling was carefully laid out and mounted with authentic cable holders.
The electrical installation is now new. New wiring and components to ensure reliability and safety.
We added a fuse box with separated circuits.
Cabling was carefully laid out and mounted with authentic cable holders.
The fuel system is also new.
We decided to order a custom made fuel tank to ensure clean fuel and improve safety.
We decided to order a custom made fuel tank to ensure clean fuel and improve safety.
The copper fuel lines are mounted. A fuel filter and water separator is added to protect the engine.
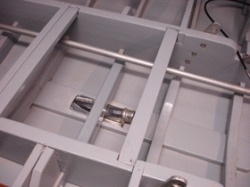
A new chromed shaftlog is mounted on the keel.
The steering system is refurbished and put back.
The steering system is refurbished and put back.
June 2007
The engine is put back in place.
The engine is put back in place.
Completing the technical installation.

Cool water system.
An open system with new classic parts. Water scoop with safety valve and water filter.
An open system with new classic parts. Water scoop with safety valve and water filter.
Exhaust hoses
Exhaust silencers fitted.
The original exhausts are rechromed and installed again.
The original exhausts are rechromed and installed again.
The rudder system is restored.
Finishing!
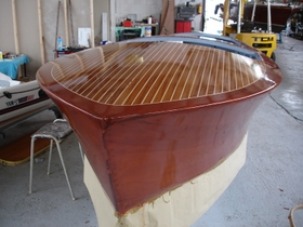
The 20 varnish coats are settled and the boat now needs to get his final gloss.
Last sanding, decreasing and ready for the dust free cabin.
The 20 varnish coats are settled and the boat now needs to get his final gloss.
Last sanding, decreasing and ready for the dust free cabin.
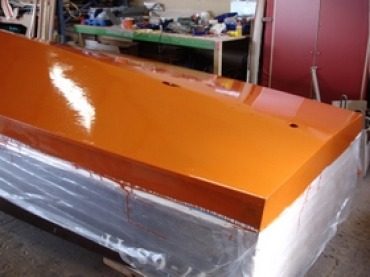
The final coat of varnish!
Putting it all together!
Now we can finish the boat. All parts can be fitted.
Now we can finish the boat. All parts can be fitted.
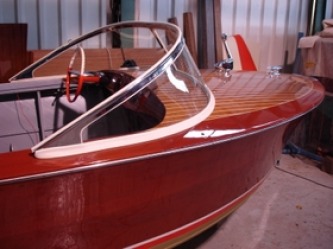
The nose, side strips (new stainless), Window frame and glass, navigation lights and so on...
The original glass window panes have been polished and treated by a specialist to remove all scratches and get the original gloss back. This was a good decision as it shows!
The original glass window panes have been polished and treated by a specialist to remove all scratches and get the original gloss back. This was a good decision as it shows!
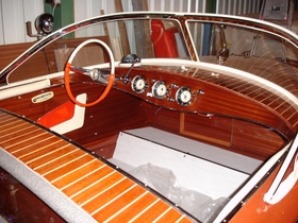
Instruments, steering wheel, side panels and flooring are put back in place.
Click here to edit.
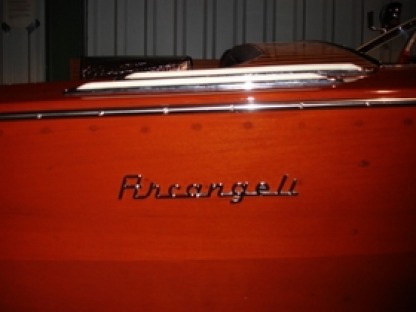
All chrome parts are mounted. The Arcangeli name is finally screwed on.
All chrome parts are rechromed. Some parts are replaced with original Italian or Riva parts.
All chrome parts are rechromed. Some parts are replaced with original Italian or Riva parts.
The boat cover is ordered. We placed the support for this cover.
In the meantime the custom cover is made.
In the meantime the custom cover is made.
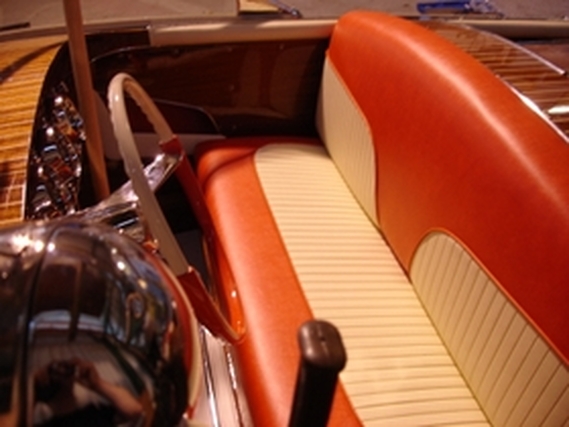
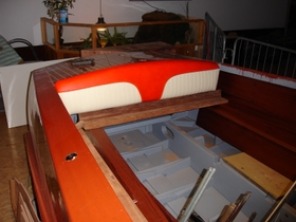
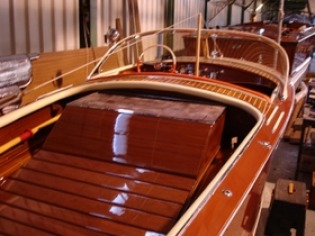
The seats are put back. This looks stunning!
August 2007!
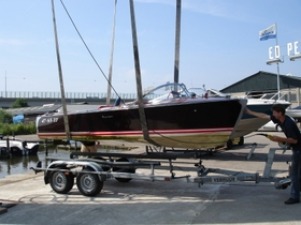
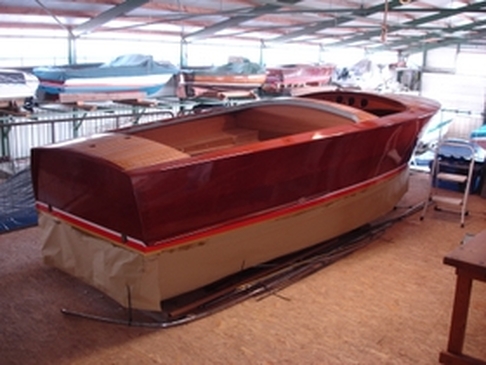
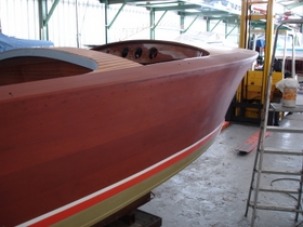
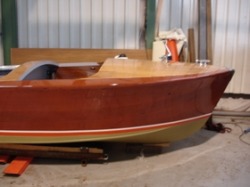
After 26 months the Super Jolly #94 is floating again!
This time as a reborn classic runabout in it's original beauty.
Now it is time for testing and tuning.... this took all in all a few weeks. Some modifications to the driveshaft, engine adjustment and some other minor things needed improving.
After 26 months the Super Jolly #94 is floating again!
This time as a reborn classic runabout in it's original beauty.
Now it is time for testing and tuning.... this took all in all a few weeks. Some modifications to the driveshaft, engine adjustment and some other minor things needed improving.
The Arcangeli Super Jolly #94 has been returned to it’s original beauty
and is sold to an enthusiastic in Amsterdam.
The boat was restored by WoodenClassics as a demonstration project and show case.
The Super Jolly has been restored in all his facets and details. All the woodwork is restored or replaced, the bottom is new and the engine is restored by a specialist company.

The compliments to the guys of Woodenclassics.com
they did an awesome job!!